
How To Install and Setup Insteon Fanlinc with 6 Button Keypad
How To Install and Setup Insteon Fanlinc with 6 Button Keypad
When I first got my shiny new Insteon Fanlinc I was hoping for a simple and fun install. Turned out to be a bit more difficult than I’d hoped. for. It turns out you can’t use a traditional switch at all once you install the Fanlinc, because turning off the switch will kill the power to the Fanlinc. You can only use the Fanlinc to control the fan once installed. So, the most natural solution is to install the Insteon Fanlinc with 6 button keypad (or 8 button keypad, as it has the same basic functions). That turned out to be a very frustrating situation as well, because I then needed to figure out how to change the wiring to accommodate one switch where there were two, and how to program the keypad, as it does not natively come set to control the Fanlinc.

Despite many attempts to find good resources on how to get this done, I found there was no good clear source on how to set this up. So, I made it my responsibility to do that for you, my loyal following. In this “how to” video, I show you, step by step, how to install and set up Insteon Fanlinc with 6 button keypad. Enjoy!
- Cut the power to the area at the circuit breaker.
- Remove the old switches (whether you have one for each the fan and light or one that does both, it won’t matter with this setup).
- Install the Fanlinc as the instructions dictate except you do NOT use the red colored (usually) LOAD wire running from your gang box to the fan. Cap it off on both ends. Connect the Red wire on the Fanlinc to the fan’s MOTOR wire only.
- Install the 6 button keypad as instructed except you do NOT use the red colored LOAD wire coming out of the switch. Cap it off.
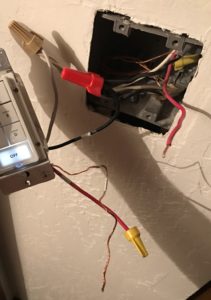
Insteon 6 button keypad wiring - Turn the power back on to the devices and Pair them to the network. (You will need to pair the 6 button keypad and both the Light and Fan controls on the Fanlinc individually.)
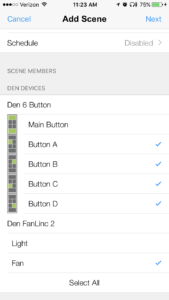
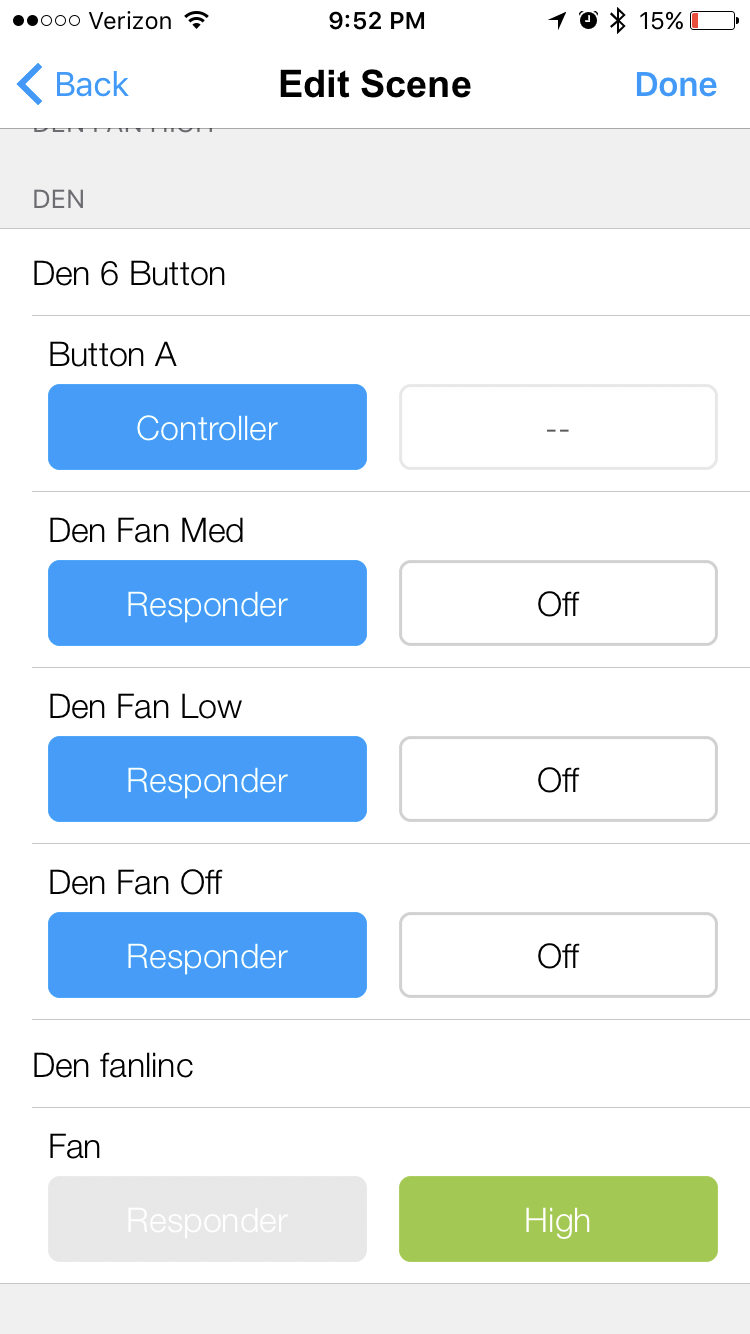
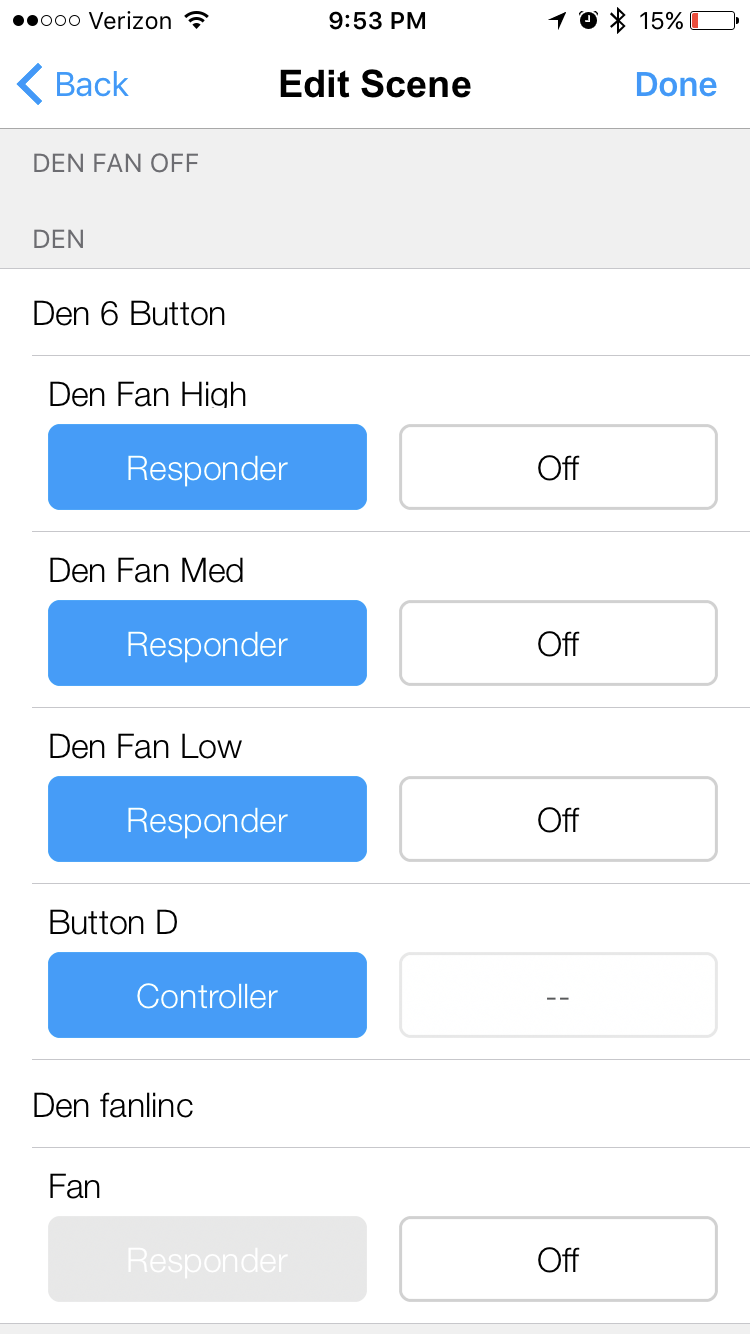
- Create 4 scenes for the fan speeds; one for each speed: High, Medium, Low and Off. Use the screenshots below to see the settings to use. The video above gives a more clear walk through and explanation of settings you will need.

-

Fan high setting 
Fan medium setting 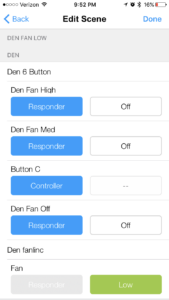
Fan low setting 
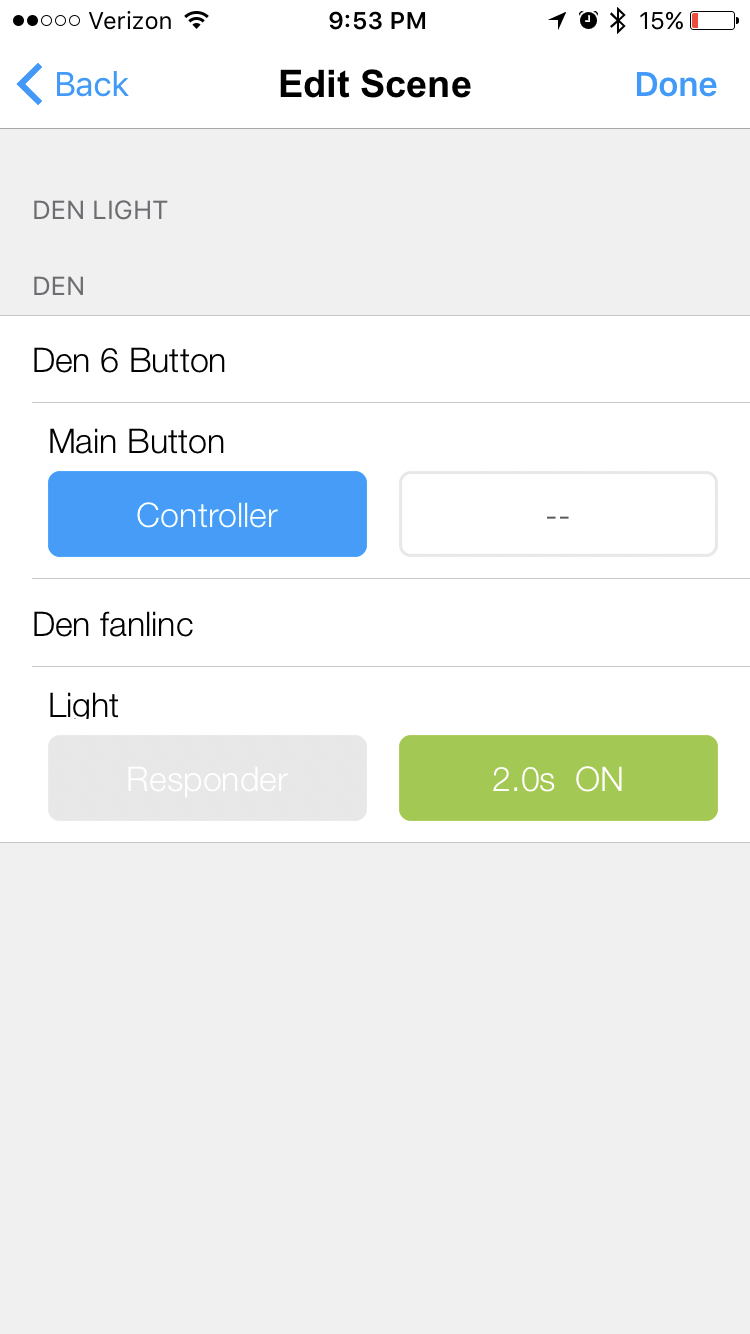
Fan off setting - Create 1 scene for the light controls. Again, refer to the video above for a more full explanation of this step.
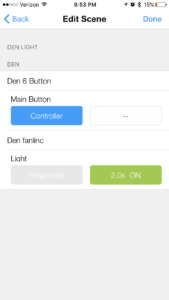
Light setting


I made it sound very easy, but figuring this out without proper guidance is a bear. I hope this was able to help you set up your Insteon Fanlinc with 6 button keypad in a simple manner. Thank you for visiting. Let me know if you have any questions or would like to ask about other tech or smart home products.
One thought on “How To Install and Setup Insteon Fanlinc with 6 Button Keypad”
Hurrah, that’s what I was searching for! Thanks Jared!